The calendar “card”
Authors creating posts that have specific dates mentioned within the article text can also choose to create a “calendar card” for their post to help draw attention to the included timelines. The calendar cards show up in the sidebar of the post alongside the content. In addition, details captured in the calendar cards also become present in the calendar grid and list views at https://innercircle.engineering.asu.edu/calendar
Each calendar card requires you to enter information related to the event title, the event dates and the event locations.
Each post within Inner Circle can have multiple calendar entries. For example, consider a post about an upcoming scholarship.
- One calendar card could be created for students wanting to put the application deadline on their calendars.
- A different calendar card could also be created for students wanting to attend an info session about the opportunity.
Multiple cards or multiple posts?
If the information you are attempting to convey to students consists of a longer list of separate but related events, consider creating separate articles for each “session” within the series rather than a single article with multiple calendar cards.
We can apply a post tag to a group of articles to construct an archive page specifically for your event series which serves a better jumping off point for students interested in understanding the whole picture.
An example of this consideration might be a lecture series that requires reservations in advance to attend.
- Each lecture in the series should probably be its own post.
- Each lecture post could have two calendar cards attached: one for the reservation deadline and one for the actual event.
- All related lecture posts could then be given a unique event tag which would produce an archive page similar to the undergraduate or graduate landing pages within the site.
Card titles and links
For each calendar card, you are required to fill out one field within the titles and links tab. The other two fields below are optional.
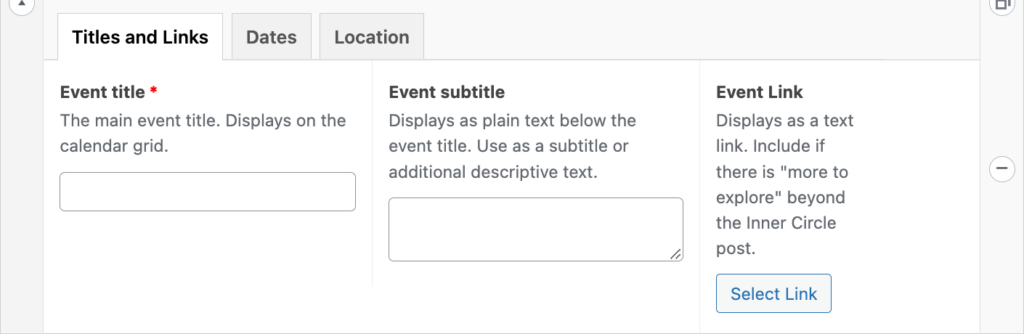
- All event cards need to contain an event title which shows up at the top of the card and is also the visible piece of text on the calendar grid and list views.
- Additionally, you may choose to supply an event subtitle or additional description which shows up immediately under the title within the card.
- Finally, if your calendar entry or event post also contains a link to an external resource like a signup form, job posting or an additional web page you can create a link to that additional resource using the event link button.
Display Options and Dates
Calendar cards have multiple ways that they can display a set of dates and times depending on the scenario. You can find the option for selecting the “standard” calendar card or one of the other specialized card displays within the dates tab.
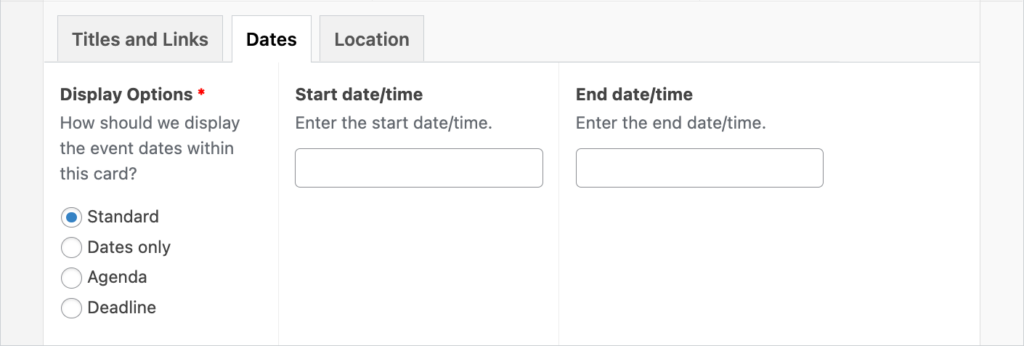
There are four display options available. Each option will make the calendar card look slightly different.
Standard Display
The “standard” calendar card is intended for use with events that start and end on the same day. The card displays one date and a range of times indicating the beginning and end of the event.
The calendar grid view will also indicate the start time of the event in the entry.
Dates only Display
The “dates only” display choice is intended for events that span multiple consecutive days. The calendar card drops the display of the start and end time for the event in favor of a clearly labeled start and end date.
The calendar grid indicates these events are “all day” events and gives them a special treatment to indicate the start and end days for the event. When added to Outlook or Google, these events also appear in the “all day” section of the calendar date.
Agenda View Display
The “agenda” display choice is perfect for occasions in which there are specific times within the event duration that need to be communicated to the audience. Examples of this include receptions which may include a “meet and greet” followed by more formal programming. Related venue changes within the same general vicinity are also easy to include with this type of card.
Once the “agenda” display has been indicated, a fourth tab will become visible in the interface which reveals the space for you to type the event details.
The agenda details should be as short as possible as the card doesn’t display more than a few words before wrapping the text to the next line.
The agenda details will be captured within the description of the event when the card is added to Outlook or Google.
Be sure to continue to capture the start and end times accurately within the appropriate fields for the card.
Although the indication of a start and end time is replaced by the longer description or “agenda” content section, the event still displays on the calendar grid as a “standard” event spanning several hours of the day.
Deadline Display
The “deadline” display focuses on the end date specified within the calendar card to provide a clear deadline for the prompted action. The date and time uses a slightly different construction and icon to clearly set it apart from other calendar cards that may be associated with the same event.
The calendar grid displays these kinds of events as a single entry on the calendar with a duration of 1 minute.
When added to Outlook or Google, the event also is tied to the reminder system for the calendar application to announce the deadline 12 hours in advance of the specified time.
Be sure to set a start date for your deadline event cards.
Although the start date is not considered within the display of these kinds of calendar cards, a start date and time are necessary for the event to display on the calendar grid correctly. When creating these kinds of cards, set the start date and time to “now” using the default button in the date picker control.
The reminder time is currently not a value that can be set by the end user.
But, by default, the 12-hour increment produces a reminder alert that’s either early in the morning for a 5 p.m. deadline or noon for an 11:59 p.m. deadline.
Location Details
Each calendar card can also indicate a location from a dropdown control within the form. The dropdown contains most of the common spaces for ASU Engineering students among both the Tempe and Polytechnic campuses, with West campus locations coming soon. The dropdown also will supply a link to the physical location powered by the ASU Maps application.
In addition to the indication of the building for the event, you may supply a specific room number within the room field. You can also indicate more general places like the “south patio” or “4th floor lobby” in this space.
Need to specify an event without a physical location?
- Look for the terms “online” or “Zoom” within the building dropdown.
- Leave the room field blank and instead include the correct link for the online meeting as the link for the card.